
A kitchen ceiling is easy to overlook, but the right one adds warmth and visual weight to a room that would otherwise feel flat. The original plan for this space was a farmhouse-style recessed ceiling alcove — a framed, coffered look set up into the ceiling. The catch: the existing ceiling framing made changing the overhead structure a non-starter, so recessing the ceiling wasn't an option.
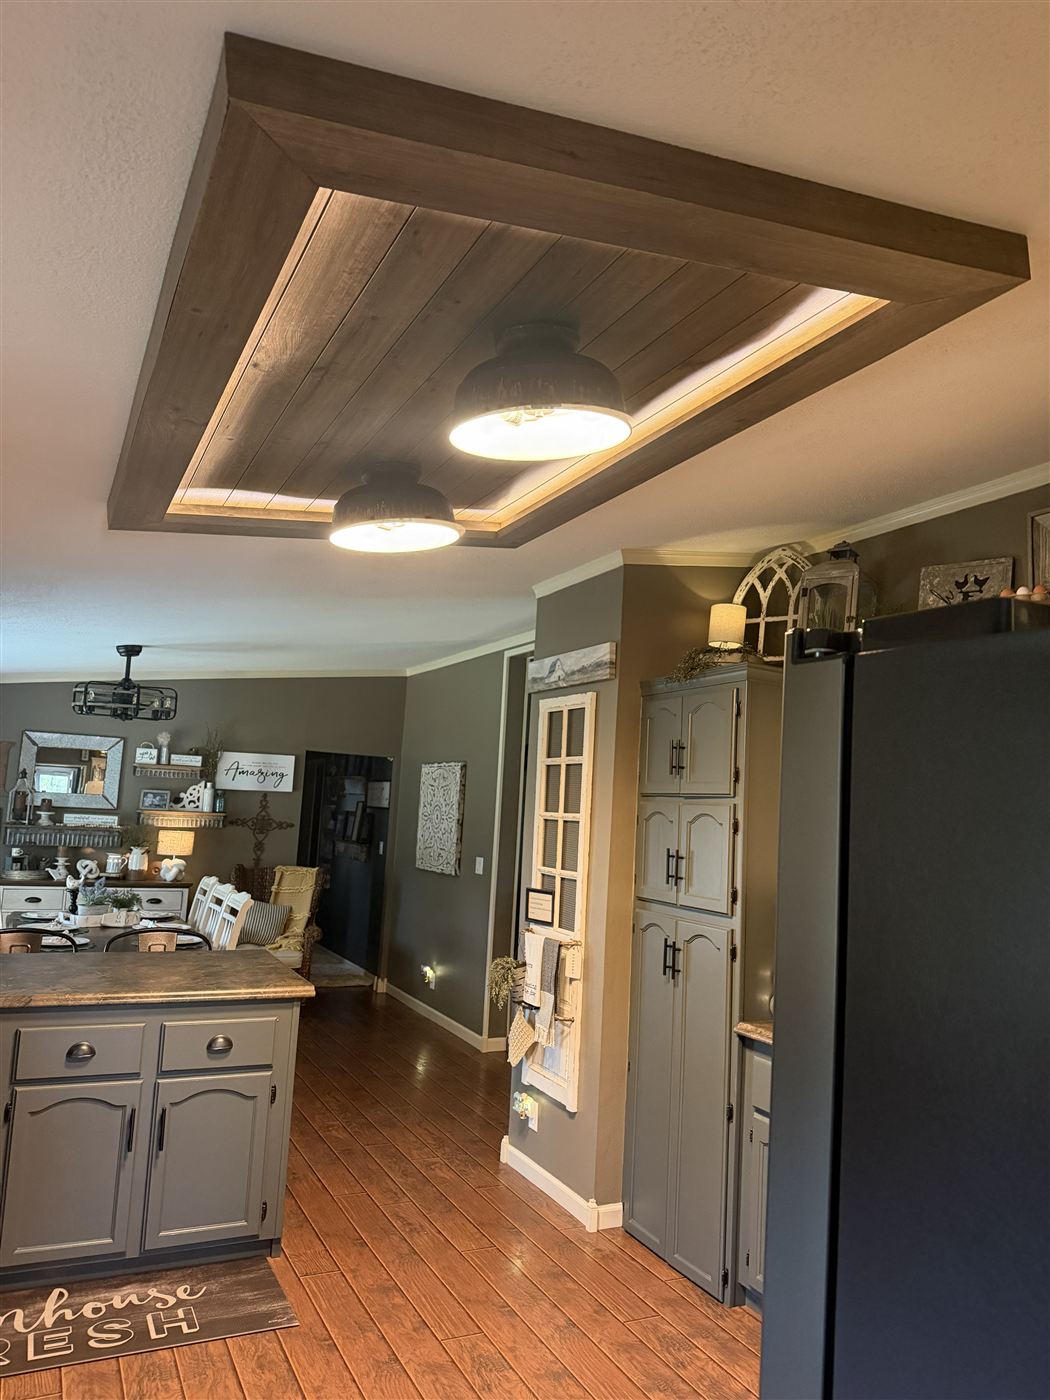
Rather than abandon the concept, we flipped the approach and dropped the trim work downward instead. The result is a protruding, shiplap-inspired ceiling feature that delivers the same dimension, texture, and framed look as a true recessed coffer, without touching the framing above.
The finished piece floats over the kitchen as a focal point, blending raw architectural character with modern lighting. Central fixtures handle the task lighting, while a subtle LED strip around the perimeter adds depth and a warm glow — and the whole feature matches the home's overall style.
Before & After
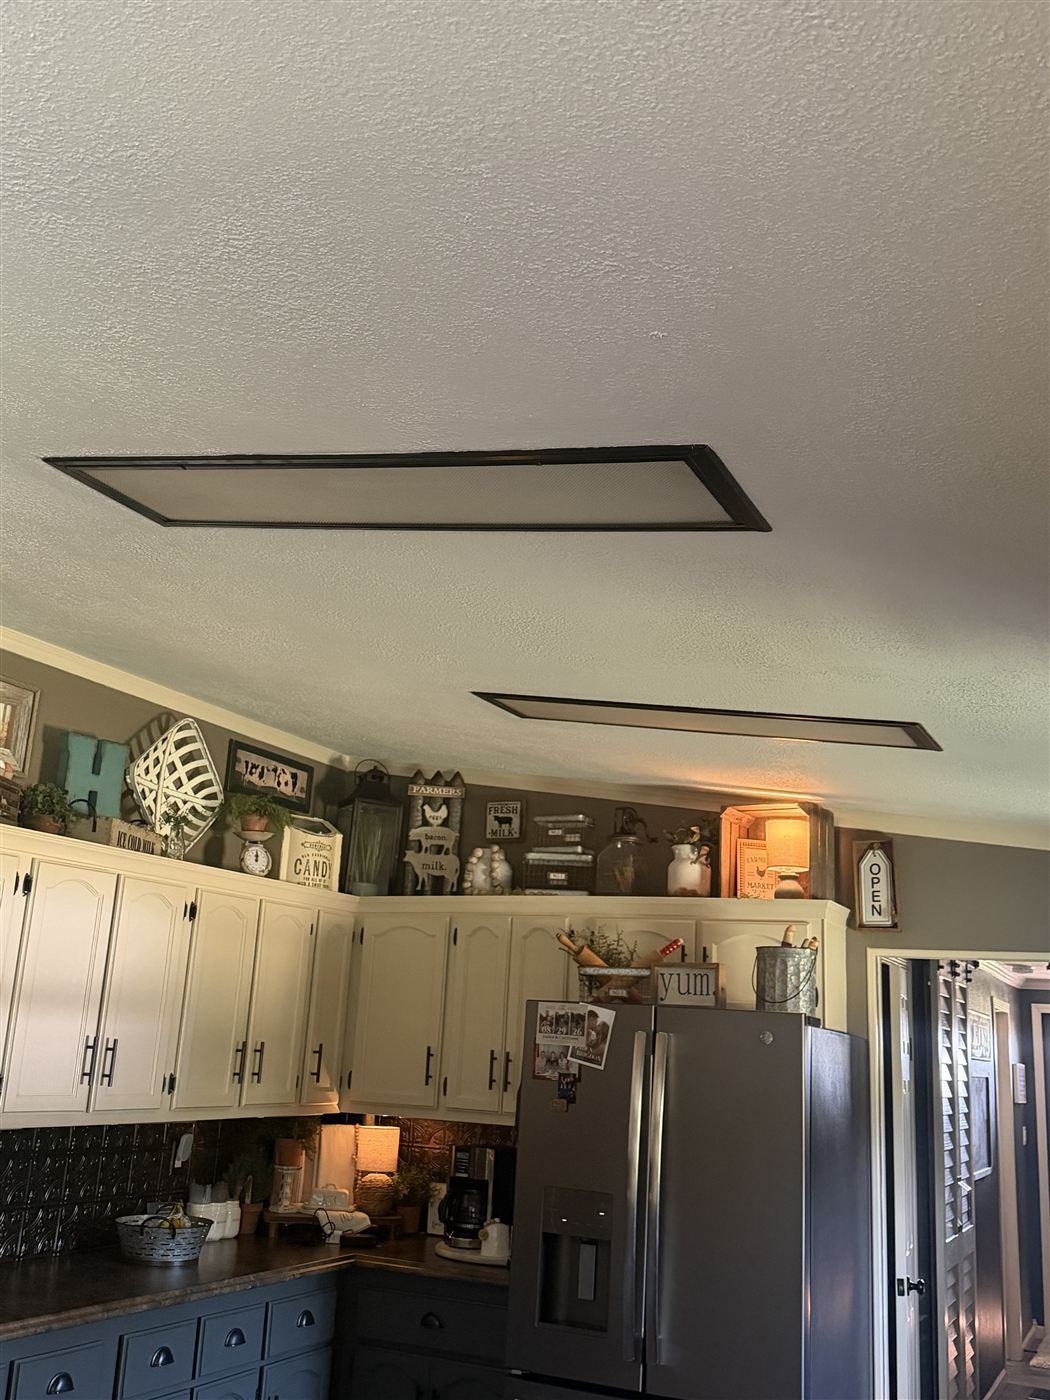
Drag the slider to compare the original ceiling with the finished feature, or tap the expand icon for a larger view.
Materials & Planning
This project took careful planning up front. We had a remote job site, materials the homeowner had already purchased, and existing ceiling conditions to work around.
- Remote job site, fixed material inventory: The homeowner pre-purchased all the primary materials, including the pre-finished laminated wood veneer and the shiplap paneling. With the nearest hardware store 1.5 hours away, there was zero room for waste, miscuts, or running short mid-build. The frame dimensions, shiplap layout, and miter sequence all had to be engineered around the exact square footage and board count on hand before the first cut.
- Concealing the old fixture footprints: The ceiling originally had older recessed tube lighting fixtures, which left sizable openings and drywall damage once removed. Instead of patching, mudding, and re-texturing the ceiling, we sized and positioned the protruding "cloud" framework to span and hide the old cutouts — saving significant prep time and giving a clean, integrated finish.
- Proportion and scale: A dropped structure should read as a deliberate feature, not an obstruction. We calculated the length, width, and projection depth against the kitchen's floor area and ceiling height. The final dimensions are deep enough to house the accent lighting channels and cover the old openings, while preserving vertical clearance and keeping the space balanced over the kitchen island.
Construction & Assembly
With the planning and material constraints settled, the build came down to three technical phases: structural subframing, custom beam trim fabrication, and concealed electrical integration.
- 2x4 subframe: To carry the weight of the feature and set the projection depth, we anchored a rigid 2x4 subframe directly to the ceiling structure. It did double duty. It created a solid, level mounting grid that bridges and covers the old lighting cutouts, and it set the exact perimeter the finish trim needed to follow.
- The "oversized beam" illusion: We wanted the outer frame to look like a heavy timber beam without the weight of one. The pre-finished laminated wood veneer was wrapped around the 2x4 subframe, and every corner and intersection was compound-mitered and glued. The result is seamless outer edges that completely hide the framing inside.
- Concealed LED channel: Instead of mounting the strip lights flat against the ceiling, we built a dedicated lighting channel into the inside perimeter lip of the frame. The LED strips sit deep inside that hidden channel, so the individual diodes can't be seen from anywhere in the room, and a soft, continuous glow washes across the shiplap field inside.
The Finished Result
The best way to appreciate this ceiling is to watch it come together. The timelapse below takes you from the original ceiling, through the framing, trim, and lighting install, to the finished feature glowing over the kitchen. Press play to see the final result.